Showing posts with label DIY. Show all posts

Saturday, May 14, 2011

My Apologies...

...it has been FAR too long since I have posted.  I promise to be better.  My blogging sabbatical is now over.  Hubs started a new job and figuring out babysitting and MY work schedule around photography and remodeling has been...a challenge.  A good challenge...but a challenge none the less.

This post is gonna be kinda interesting.  I have a few things to share.  First off...

This.

Just 'cause. 

Now onto cabinets.

The cabinets in the kitchen were hung quite a while ago but for some reason I forgot to post about them.  Now I know that people typically hang the tops first...but we decided to do the bottoms first because they took a lot of creativity to mash together and Hubs was in the mood to be creative.  So they were done first.  Honestly...we liked doing them first.  Made it easier to hang the top ones because we had to be creative in how we were gonna get them in place.

I'm rather a weakling so when it comes to drilling into brick to hang a cabinet...that is the Hub's domain.  But since I'm a weakling...I cant really hold up the cabinet either because it was so high, and we have 1 step ladder.  So Hubs came up with a genius idea.  This...


Yup...that would be our car jack.  We stuck up a cabinet that we weren't going to use and then put paint cans on top of the cabinet to add some height.  Then we put our hydrolic car jack on top of it with a board to stead the cabinet and then all I had to do was hold it steady while the first few screws were put in place.  Snazzy huh?  Hubs was quite proud of his little invention...

 
As you can tell.  (please forgive the mess in the kitchen.  I know it's a construction zone but with how small it is...you really can't hide anything.  haha!)

Also, on his head is our headlamp.  He called that his inspiration lamp.  It was quite funny.  He was cutting trim and wasn't wearing his lamp.  All of his cuts were off...even after multiple measures.  He was so frustrated!  Then he put on his headlamp and voila!  He was good from there on out.  It's his bestest friend right now.  Haha!  I think it makes his hair look funny.  :)

To hang the cabinets...we decided a long time ago we were going to push them to the ceiling.  Hubs screwed a 2x4 into the ceiling so that he could add some support to the top and screwed the cabinets into the ceiling first.  After securing the cabinet on the ceiling we had to screw them into the wall.  Now both of our upper cabinets are on exterior walls.  Not a big deal you say?  Uh.............they're plastered brick.  Not lath and plaster...oh no.  Plastered brick.  Made the lath seem like it was a dream to work with.  We have cheap-o tools because we didn't realize we were going to turn into home renovators when we bought our tools.  It took both of us pushing that electric drill as hard as we could push to screw in these massive screws.  Let me see if I can find a picture online to show you how huge these blue suckers were...

AHA!  Found the pic...
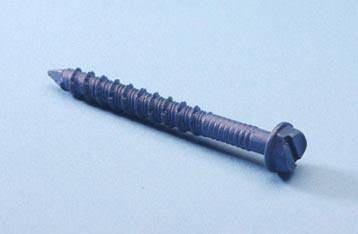

You can't really tell how massive they are in that picture but trust me...they're large.  And heavy.  And may slightly intimidate the dickens out of me. 

So.  We got the cabinets installed and took a break.  It was exhausting.  

The beadboard wainscoting was done before installing the cabinets...here's what it looked like pre-caulk


It looks so different now because we've installed the window seats.  We elected to go for tall wainscoting because little hands touch all over and it'll be a lot easier to clean off than just a painted wall.  I'll be back with details on that later.  

To end...I have to leave with this picture.  


A teaser of what's to come.  :)

Thursday, March 24, 2011

Window Benches...

...are being finished today.  Woot woot!  So excited about that.  Really...I'm doing happy hops in my desk chair as we speak.

Of course, that might have everything to do with having my crown molding finished in the kitchen.

Oh happy day.

Honestly...the Hub's and I just stood in the middle of the room after he nailed up that last piece and we just stared.  It's amazing the difference it makes in a room.  And really...?  I think now that I have it in 1 room, I'm gonna want it in all of them.  That and the paneled ceiling.  I'm addicted to paneled ceilings now.

So we're moving onto window benches today.  We already framed 'em in...we just have to build the actual box.  They're going to be a lot more storage which is totally happy.  I think I'm gonna store all my seasonal stuff in there.  You know...things you pull out every 3 months...

The exciting thing about that is that I can finally buy some fabric!  I've been shopping for fabric ever since this whole thing started.  And now...I can finally whip out the bank card and get it done!  So first fabric we're buying is the fabric for the long window bench seat.  It's about 6 feet long.

This is what I've picked out...
I love stripes.

Love them.

Hubs loves stripes.

We figured it would be a good choice.  I like the muted black...it's not quite black but not quite gray.  I really kinda like it.  Not to mention that its totally neutral and will go with my blues, grays, and greens.

I'm buying the foam today after work and the fabric is being ordered the instant I get home.  I'll do a tutorial on sewing the seat cover as soon as its completed.

I love this part of having everything come together.  This is the first time I've had inspiration pictures and let me tell you...they make all the difference.  They really help you to decide what you love and what you can live without.  What you can compromise on and what you don't want to compromise on.  More on that later.

Wednesday, March 23, 2011

What a pretty bowl!

So last night was very eventful.  After a lot of tears and faux cursing (you know...things like DRATS!  DANG IT!  SERIOUSLY?!?...things like that...) on the Hub's side we finally figured out crown molding.  He's gonna do a tutorial on it 'cause seriously...everything we read just did.not.work.  Unless you're a contractor and this is what you do for a living.  Then I'm sure it would make sense.  We however....?  Are not.

So little brother saved the day.  I love calling my brother little brother...'cause he's 6 feet tall.  Not really so little.  He's skinny as all get out but does kinda tower over me...and I'm not really short.  I think he seems taller 'cause he's so skinny.  You know what I'm talking about?  ANYWAY!  I digress.  Little brother came over.  He had previous experience cutting and installing crown molding.  Yeah...we should have called him to begin with.  Then we would have had less of a reason to faux curse.  And I got to chat with sister-in-law.  And that was really fun.  And sister-in-law is quite possibly one of the Princess's favorite people in the world so she was a little angel all night long.  Even when she was rubbing her eyes towards the end.

BUT!  That is a post for another day.  And trust me...it'll be a good one.  The post for today is all about bowls.  In particular...these bowls.


More particularly...THIS bowl...

Um...I think I really really need a couple of these for my new kitchen.  I adore that gray with the blue lip.  Seriously...love.  

I'm also loving this one...


And this one...


Cause you know...I've realized the kitchen is going to be finished before I know it and I'm going to need some things to make it pretty.  And with my dishes being on open shelves....yep, I'm getting some new ones.  But I have a surprise for you in regards to that.  And I'm DYING to share...but I just can't.  So you'll have to just be surprised. 

And stay tuned...more on crown molding coming up this week with another sneak peek on how the kitchen is progressing...

Monday, March 21, 2011

Makeover Monday

So I decided to show you a teaser of what our cabinets look like right now.


This is the cabinet that we pieced together.  More on that later.  Also...the cabinets to either side of it were once a corner cabinet.  You know...the ones that have the lazy susan in them?  Yup...you'd never guess would ya?  And you just wait until this whole thing is finished.  You're gonna be in shock!

Also...had to show off my hubby's mad skillz...


We may have a couple of these in the wall hidden behind the wainscoting but it was for a good cause.  Why you ask?  Because it got me this...


THAT my friends, is a beautiful outlet where I thought I was not going to have one because that is an exterior wall that is pure plaster and brick.  What we would have given for more lath when we discovered that...

We had to retire the old pathway altogether because it was a NIGHTMARE...not to mention more crappy cloth covered wires that the Hub's blogged about HERE.  Yeah...it was NOT pretty.  But the Hub's prevailed and was a genius and now I have my outlet.  AND...another one too!


This extra outlet MIGHT have been one of the coolest thing Hub's has EVER done.  He may or may not have gotten a great big kiss for that.

Anywhoo....just a teaser to show you that it is in fact coming along.  We're putting in the window seats this week so we'll have a big old long post about that coming up soon.  So see ya later!

Monday, March 14, 2011

Makeover Mondays

So I think I'm gonna make Monday's my official day to post on our re-models.  Since we've only started working on 2 of our many many rooms...it should last a very long time.  Haha!

For today...Our kitchen floor.

Wow.

I think the linoleum was original to the house.  It was filthy and no matter how hard I scrubbed...it just would not get clean.

Yuck.

So it had to go.

#1...I hate linoleum so we were definitely NOT putting anything laminate back in.  In the process of remodeling...we discovered wood floor.

Original wood floor.

Unfinished wood floor.

It was a miracle.  And I may or may not have jumped up and down.

So we ripped up the linoleum.  And this is what we found.


60+ year old mastic.  With tar underneath it.  Uh say what...?

Tar.

I was kinda in disbelief and may or may not have cried.  Yup...went from dancing and jumping to crying.  So yeah...we had to get the mastic up.  We read many many ways to get mastic off the floor.  And we tried 'em all.

First up?  Water.  We were told to put water all over the mastic and let it sit for 20+ minutes and then the mastic should just scrape right off...like putty.  Result?  Nuthin.  Other than a huge mess.

Second.  Let a mixture of water and vinegar soak on the mastic and then again...it should just scrape up like putty.  Result?  An even smellier mess.  It was pretty much disgusting.

Thirdly.  Mineral spirits.  Again...nothing.  Other than major fumes which really really smelled.  BAD!  I banished the Princess from the house when the Hub's was experimenting with that one.

It went from messy to messy and smelly to messier and smellier to downright disgusting.  So something had to change.  I was ready to throw in the towel and get some tile.  I was looking at slate tile and some pretty ceramic tiles and also the price of unfinished hardwood floor since I kinda had my heart set on it.  But then the Hubs found an article mentioning dry ice.  Now the Hubs has a hard time with dry ice.  It's one of those things he was just a bit afraid of buying.  Well, he's over it now.

So we put the dry ice on the mastic.  We let it sit for a minute and then he was able to scrape it off...

Just like this...


So he scraped the whole floor free of mastic.  It was some hard work.  But the tar didn't come off with the mastic.  After he was done scraping...it looked like this...


Um yeah...that's not happy.  Again...I started shopping for floor options.  Slate was looking better and better.  But the Hub's wouldn't have it.  He was determined to get it off so we paid a visit to our bestest flooring friend...


Yup...our favoritest floor sander.  We love this fella and even nicknamed him Handy Manny...or just Manny for short.  Here's another shot of the lovely floor...


Yup.  That's a pretty bad before.  I was absolutely sure it wasn't gonna work.  I just knew that it was not only a waste of time but a waste of money...I was trying to get the Hubs to just let it go but he was emotionally invested in the floor.  His blood, sweat, and tears (all quite literally) were in that floor.

So after all of that work and my doubting...the Hubs unveiled THIS!!!


Yes...I know it's still a little rough...but this is the floor, sanded down and unfinished.  I couldn't believe he was able to do it.  I was seriously in shock that it looked this good.  He went through the roughest grit of sandpaper oh...about 5 times and then all the other grits to make the finish nice and smooth.  Staining the floor is gonna be our last step.  Here's another shot...


You can see the corner where the window benches are going.  We were lazy and didn't scrape that corner.  It's just gonna be covered up with built-in window seats anyways...which is also why we didn't stress about the bead board going all the way to the floor.  Hee hee...

That picture also gives you a sneak of my tall wainscoting.  Isn't it beeeeeeautiful?  And the paint color is a bit green in that picture...which is odd.  It's actually not green at all.  More blue gray than green gray.  Weird.  Obviously we haven't put up the window casing or the crown molding yet...but it's just a sneak.  Hope you liked it!

Friday, February 4, 2011

Kitchen Progress....

Oh my gosh...oh my gosh...OH MY GOSH!!!

My base cabinets are IN!  They're installed!  They make me sooooooooo happy!

It was a bit like taking a jigsaw puzzle and cutting the pieces to make them fit together...but it all worked out beautifully.  And since they were free...who can argue?

My brother came over today to help out and he and the Hubs were done with the planning, cutting, piecing, and installing by 8:45.  So from 3:30ish to 8:45.  Yup...they're super-hero's.  When you see pictures...you might think that was an eternity for just 4 cabinets...but when the Hubs tells what went into it...you'll completely understand.  Honestly...we're shocked it went so fast.

So.  What is left in regards to cabinets are the wall cabinets.  As a refresher...this is what we're planning on doing...


I love when I find kitchens that have so many of the same elements that I have planned for mine.  

The ceiling in that kitchen is the same as mine, the white back-splash, the crown molding is lovely...It's almost exactly what I have already picked out.  But the thing that I would like to point out the most is the raised wall cabinets and the shelving underneath.  We are doing the exact same thing.  I have always hated how much space is wasted between cabinets and the ceiling so we're maximizing that space and doing the same thing.  

It's really one of those ideas that makes you hit your forehead and think "Duh!"  At least...that's what I did.  

So our cabinets are going to be painted a nice, crisp white (base and wall).  The bead-board is going to measure 2 feet from the ceiling.  The 2 feet expanse of wall is painted a beautiful cool gray.  There's going to be a lot of open shelving and additional storage solutions.  Here's another inspiration picture of storage...


Love the stainless bar...that'll probably go on the wall with the appliances. 

I just love how I'm finally seeing the kitchen actually come together and it's better then I pictured.  There was a time when we were tearing everything apart where I thought..."We are crazy.  This is a mess and it will never be put back together.  What were we thinking?!?!?!?"  But it's all coming together and I just smile every time I walk in there. 
Oh...and just so you all know.  Due to a very positive feedback from the Hub's last post I am pleased to announce that he is now addicted to blogging and will be blogging again tomorrow.  :)  See?  Comments really do help.  So thanks to everyone that commented...he's hooked.  Hee, hee!

Sunday, January 30, 2011

Someone was smokin' somethin when......

...they invented Lath and Plaster.


Hubs here...the hot one in the mask.  I bring to you the raw perspective.  The...how shall I say this...male viewpoint.  Yup, I'm a guy and this is my side of the story.  Ladies and gentlemen...listen up.  Lets start with lath and plaster. Seriously awful stuff. From the Stone Age.  Caveman cake. After the wheel....came Lath and Plaster. It worked for a while I guess. Until some genius came along and invented SHEETROCK!!!! Wahoo what a revelation!!! A few good ideas from the 20th century....like, Let's land on the moon! Let's drink some Tang! Let's drive instead of walk! Let's send some electronic mail! And Let's build houses with Sheetrock!!!

Unfortunately for me, we decided to pulverize a wall out of our kitchen which revealed the aforementioned Lath and Plaster (hereafter referred to as the devil's playdough- aka DP). This freed up about 2 feet of extra space in our kitchen, which is totally magical. We don't have to suck our tummies in when squeezing by the table and stove. SaWeet!!!

So! What's so bad about that you say? Three words, the DEVILS PLAYDOUGH. Here's why: You hit the stuff with a sledgehammer and it crumbles to the ground (which feels good). BUT when it hits the ground, it breeds like gremlins and rabbits! Seriously! One hit, and you've got a pile a foot high to clean up! Impossible you say? Well, from a section of 2 walls 8ft by 8ft (yeah, that is kind of a lot), we filled about SEVEN HUGE Garbage cans full!!! I had a garbage can parked in my kitchen for three weeks!!! (Thanks Ogden Recycle Bins) And now, until we get a dumpster (duh, I know, but we didn't), it's in my backyard. Piled high, and probably breeding still. Darn DP.

Side note on knocking down walls.....scariest thing I've practically done. I would have felt more comfortable walking through a drive through in winter with my speedo on....at least I would've known what to expect (wore those things in High School.....on the swim team, not so much in public). The wife says "just get up in the attic and look". For what exactly? The one 2x4 that's saying, "I'm holding the roof, don't kill the wall beneath me!". "I'm not gonna do it" I said. Partner in crime Scott (Brother in Law) agreed, and was scared too. Thought we were half crazy. You see, when your contractor (Wife) got her license from Google, oh yeah, we felt like pros. We looked about seven times and saw that indeed, there was nothing above this wall but insulation (which feels like evil pillow feathers when it's falling from the ceiling).


*So we did it.


And yes, we survived. So did our house.

BUT later that night, still shaken by our bold steps, you hear funny noises. This happened to be New Years Eve when firecrackers were going off outside, which sound VERY MUCH like BEAMS SPLINTERING TO LITTLE PIECES. Got our hearts going a little. For a split second I thought, gonna run to the nursery, grab the baby, jump out of a crumbling building, and come back for the wife.

But happily it did not come to that, and the kitchen remodel is coming along. Will be doing a post on overcoming electricity schizophrenia next week. And until then, for all of you happy re-modelers out there, enjoy your Sheetrock.

*Disclaimer: Get help if you can't determine which walls are load bearing or not. Get help. Anywhere you can. It's worth the peace of mind. And so your house won't implode.

Wednesday, January 26, 2011

Ceilings...

kiOk!  Ceilings!

We decided a loooooooooong time ago something HAD to be done about the kitchen ceiling.

Why?

Let me show you.

Because of nasty icky interesting stuff like that.

Our ceiling is sooooooooooo old and yup...it's still lath and plaster.  Now we were 100% willing to tackle walls but tearing out a ceiling...?  Um, not so much.  The biggest thing we found about lath and plaster is that the stuff multiplies when it hits the ground.  A lot.  Like in Harry Potter when the horcrux duplicated by touching it...? (wow...totally just showed what a book nerd I am)  That was what happened with our lath and plaster.  We thought that just knocking down a little wall wouldn't be so hard.  About 5 (no exaggeration) huge green take-out to the curb garbage cans later...we are STILL cleaning up the durned stuff.

Told you.  The stuff multiplies.

Anywhoo...  Tearing out the ceiling?  Not an option.  Not to mention all the insulation that would come pouring onto our heads from the attic.


See the gray and slightly orange stuff?  Yup...that's insulation.  And there's over a foot of it everywhere up there.

SO!  What to do...  The answer came in the form of paneling.  Not beadboard...but the wider stuff.

After 2 hours a couple nights ago and an hour or so yesterday...check out how much better it looks.


Now obviously this is before any caulk or paint has been added...I just wanted to throw up an in-progress picture.

About caulk.  The Hubs bought some caulk that was in the white section and didn't check the bottle.  He pulled them out tonight and totally not white.  Uh-uh...it's clear.  He had to run back to the store and exchange it.  Booo.  So rule of thumb...always check the bottle.

One thing we definitely ran into was the room not being square.  Check this out...


See how it's right up against the wall in the corner...?  Yeah, look how far away it is now.  And that was perfectly leveled and everything.  Oy.  Good thing we have cabinets going in that can help distract from that.  Oh the joys of renovating older homes.  Has anyone else run into this issue?  What did you do about it?  We're genuinely interested!

Another issue we ran into is our sheets sometimes didn't perfectly line up.  They claim to be the same but some have slight differences...we're hoping caulk will help to hide that.  We'll let you know.

We ended up using 32"x48" sheets of paneling and I can't imagine how anyone could use the 4'x8' sheets without some serious man power helping out.  Over the head work is hard!  At least it is for me...I have no upper body strength I swear.

OH!  And for those of you who were interested in the Lantern tile (which I still can't get...*tear*) Overstock will have it back in stock the 2nd week in Feb...I was just emailed about it today.  It's a significant discount from Home Depot (again...not any kind of endorsement).

Tuesday, January 4, 2011

Our New Year's Weekend...& the Beginnings of Our Kitchen Remodel...

First off...Christmas.

Christmas was good! I actually don't have a single picture from the day because the Hubs wanted video instead. So there's a whole bunch of video...and no pictures. Lame. I know.
But we did go to Temple Square in downtown SLC and I have pics of that!

My favorite nativity...


...and the runner up to my favorite that has been there every year since I was born.


And just some pretty pics of around the square...


ANYWHOO!

So our Christmas was lovely. Now New Year's...New Year's was a different story.
On New Year's Eve...the Hubs went downstairs to start on the office. Quickly he realized he needed some more education on framing before diving in and felt very depressed that he didn't get a project to do. He was REALLY looking forward to using the air compressor I got him for Christmas.

He was sitting on the couch and decided...well, if I can't do the office, I'm ripping apart the kitchen. And that's just what he did. Our kitchen project has officially started.YOWSERS!
Here is a photographic journey of our weekend.

My kitchen.

Let me preface this by saying that I forgot to take before pictures until we were almost ready to rip stuff apart. So these pictures are very VERY cluttered with the items from the cupboards.

Just so you don't judge me. Haha.

The above pictures show the cupboards we ripped right on down. They also show the wall that we ripped out.

Yes...you heard me. We ripped out a wall.

Why?

Because that wall is 2 feet wide my friends. TWO FEET. That is 2 feet that cuts into my tiny TINY kitchen. You wanna see how tiny?

Here...

How far away the table is from the appliances...


...and the rest of the kitchen.

Don't you just LOVE the dishwasher casing and the linoleum? I know I know...you're just dying to live here aren't ya? And don't forget the bubble light on the ceiling. Gorgeous isn't it?

Again...don't judge my housekeeping...this is all from the cupboards. :)

The Hubs and I were laughing. We were watching a House Hunters and an agent mentioned that one of the awesome selling points of the house were its original kitchen cupboards. Um...I have original kitchen cupboards and lemme tell ya...NOT a selling point. It was awesome to watch this going on...


AWESOME!

It made me very happy.

Now the other reason why we ripped out the wall. This was on the other side.


What is that?

Well, it's a coat closet....with full size doors.

The reason I put the garbage can there is to show you how tight it is. Also...that piece of wall you see going down the stairs? Yeah...it's all part of the closet.

Ummmmmm...what? How on earth do you even reach that space. It was completely dead space. So of course the solution was to just rip it out. It wasn't a pantry, it wasn't additional storage space because you couldn't even really access it so why not extend our kitchen?

Let me just tell you...2 feet is a LOT of extra space in a kitchen.

A LOT of space.

So we had some major fun with a sledge hammer and look at what we were able to do...

Nasty fiberglass insulation falling from the ceiling. Boooooo.


Yup...that would be me with a nail gun. Don't you love my construction outfit? I'm all about comfort when I tear apart my house.

So there. That was our weekend. The Hubs was busy again today doing electrical stuff. A blog about that coming up soon. Along with an amazing and wonderful find that may or may not have made me jump up and down for joy.